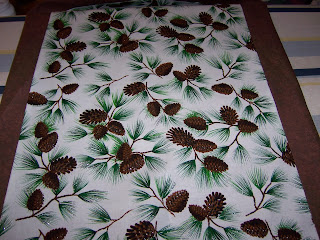
As promised (quite awhile ago) here is my tutorial for the table runners I did as Christmas gifts. Sylvia from my quilting circle brought the instructions one Saturday and I think we all went to town on them!
She had hers to show and had done a set of 12 - one for each month and season/holiday - they were just beautiful and I have since looked at something similar in the stores and they are quite expensive!
I had purchased the fabrics specifically for the people who were to receive them. (matching their decor)
Each runner requires 1/3 yard of 'focus' fabric (main one to show) and 1/2 yard of background or 'frame' fabric.
1. Cut off the selvages of both pieces. I would normally say 'square up' the fabrics but they are rectangles! Just make sure they have square corners and straight lines - this is hard to correct once sewn together (ask me how I know!...sigh).
2. Sew the two pieces together along the long edges, right sides together using 1/4" seam allowance, making a tube.
(Brown is the 'frame' and pine cones is the 'focus' fabric!)
3. Press the seams open.
4. Turn inside out and press the two long sides making a 'frame' on both sides of the 'focus' fabric.
5. The two ends that are not sewn will be sewn together now by folding the runner lengthwise (frame fabric outside, focus fabric inside) and sewing the ends together using a 1/4" seam allowance.
6. Press the seams open and turn right side out, this will form a "V" at each end. (some ladies sewed across the "V" to hold in place I did only on one)
7. Press the "V"
You are done - these really are easy and have many variations and uses and can be made wider for table tops and dressers if needed.
One of the ladies stuck a tassel in the tip of her"V" and it looked very elegant for a runner that hung over the edge of a dresser!
Hope this all makes sense and hope you enjoyed it - if you have any questions please let me know!


Thanks for that tutorial, Kathy. I intend to make one in the not too distant future. Hope you are keeping warm over there!
ReplyDelete