
This project started with me cleaning out some of my craft boxes and trying to organize the closet in the studio just a little better. Trying to make my creative space a little less cozy for the upcoming, anticipated warming that is bound to occur sooner or later! :) Cozy was very nice through the winter though! So there I am cleaning and I find this sort of pathetic little creature.


I came up with these directions - bear in mind I only read directions as a rule, if I left something out feel free to question!
With the first color chain 6 join with a ss to make a ring.
Round 1: Ch 3 (counts as dc), 1 dc in ring, ch 2, *2 dc in ring, ch 2, rep from * 4 more times, join with a ss and fasten off
Round 2: Join next color in the
last ch-space made (I do this so I can start crocheting over the ends), ch 3 (counts as dc), 2dc, ch2, 3dc in same ch-space, *ch 2, [3dc, ch 2, 3 dc] in next ch-sp, ch 1, rep from * 4 more times, join
and fasten off
Round 3: Join next color (you don't have to switch colors at all) in the
last ch-sp made, ch 3 (counts as dc), 2 dc in same ch-sp, ch 2, 6dc in next ch-sp, ch 2, *3 dc in next ch-sp, ch 2, 6dc in next ch-sp, ch 2, rep from * 4 more times, join and fasten off.
I have read the directions over 3 times and I think I got it right, I am using the abbreviations that I know and there may be others, if you see an error please point it out (gently-thank you)

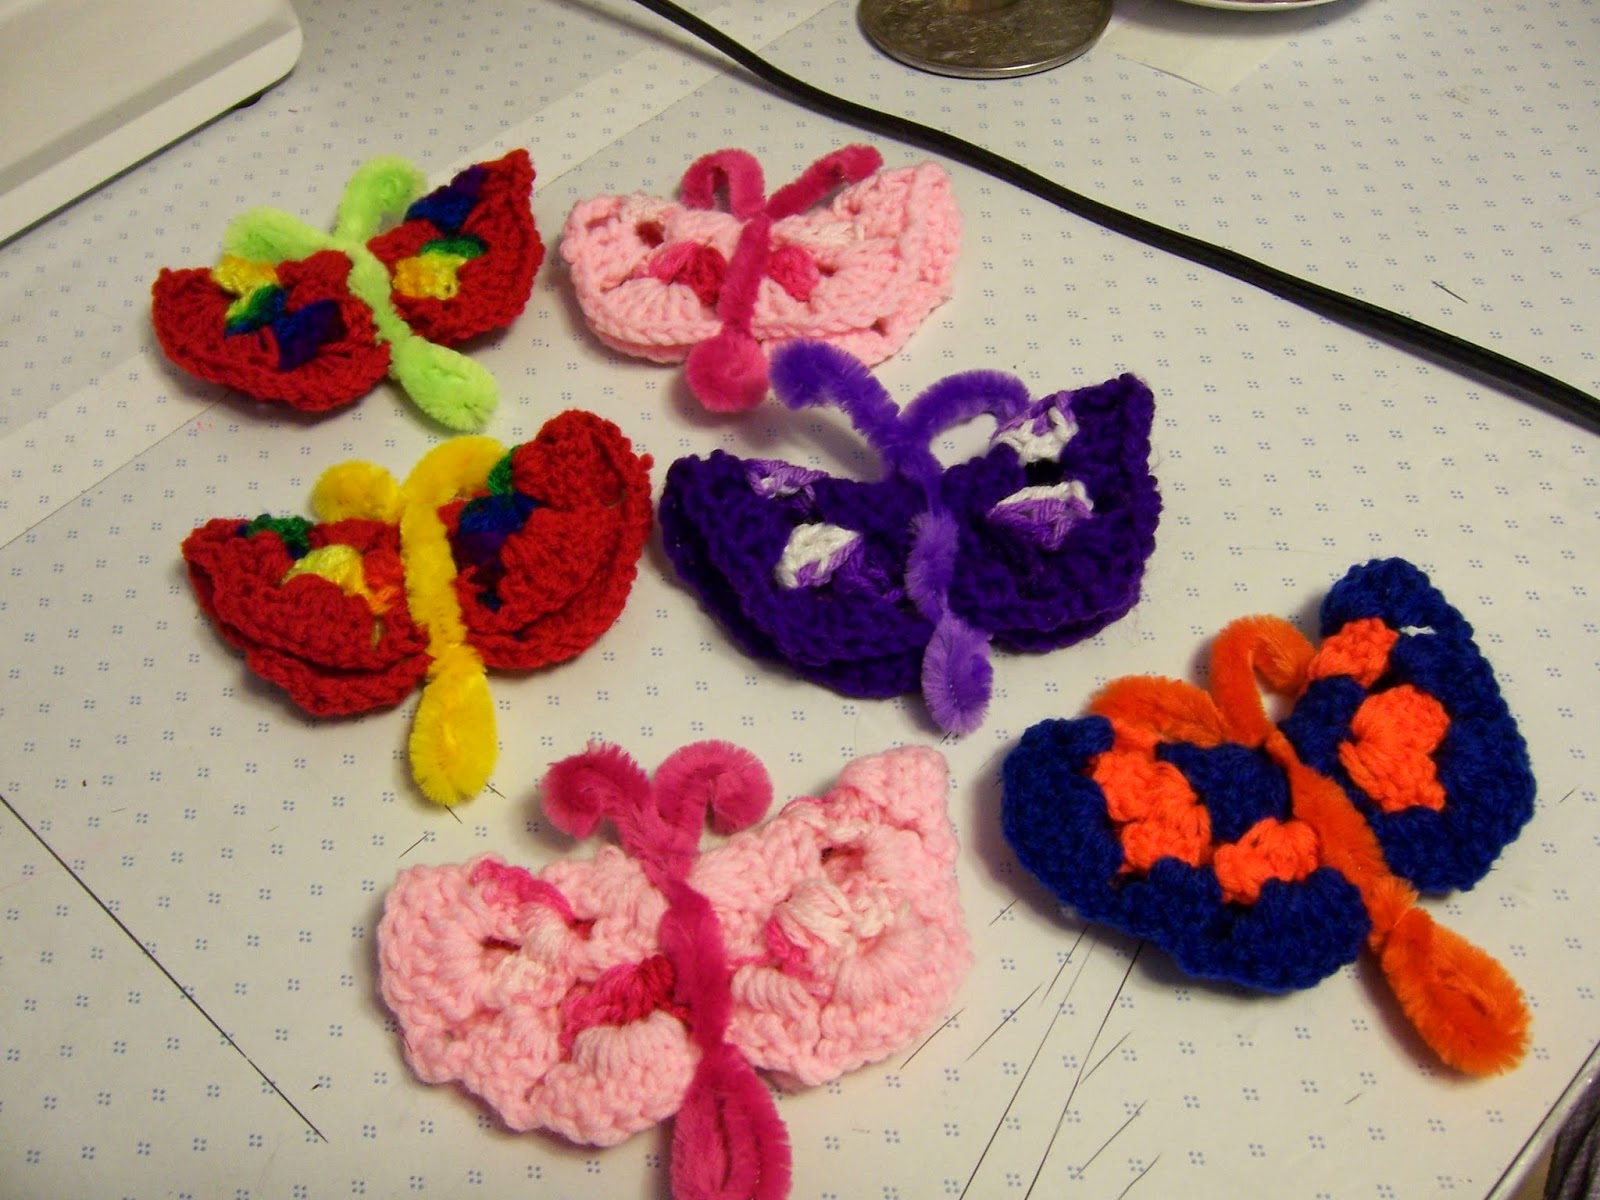
This is what you should end up with. (they are very forgiving these butterflies)
Then they can be folded in half. Take a chenille stem that has been folded in half and twist the center to make a loop for the tail, insert the folded hexagon and twist the two ends to make the antennae. I took a pen and wrapped the antennae around it to give them a curl.
 | |||||||||||
| Voila - Butterfly! |
They are quick and easy once the pattern is in your head and I did a bunch waiting for hubby at the eye doctors office the other day! Here they are migrating across the craft table!
Glue on some magnetic tape and they are ready to fly across the fridge at your house, I also thought they might make a cute wall arrangement but hadn't thought that idea through yet, maybe a mobile as well, I just think they are fun and it made me feel like the cloudy skies and rain will not be here forever. What was it Little Orphan Annie always said - The sun will come out tomorrow? But until then I have my own butterflies!
They look so cute, Kathy. I might try to make some if they are not too hard to make.
ReplyDeleteFor me the hard part was the pattern the first time! They are very quick once it is in your head! ;)
Delete